
Automations and services
This page shows how to make the battery charge, discharge or stop from a Home Assistant automation, and how to set Manual and Passive mode. Start with the device actions below: you pick them in the visual automation editor and need no YAML. Use the services further down when you need a timed charge, a weekly schedule, or more control.
TIP
To control the battery from an automation, use the device actions or the services on this page rather than trying to change an entity's state directly.
Device actions
A device action is a ready-made step in the automation editor. To add one:
- Open Settings > Automations & scenes and create or edit an automation.
- Under Then do, select Add action and choose Device.
- Choose your Marstek battery.
- Pick Charge battery, Discharge battery or Stop charging/discharging, and enter a power if you want one.
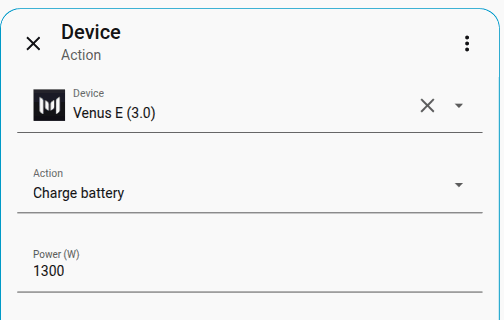
Charge battery
Starts charging the battery at the power you enter.
| Parameter | Required | Description |
|---|---|---|
| Power (W) | No | Charge power in watts (0–5000). Enter a positive number. If you leave it empty, the action uses the Default charge power from Options. |
Discharge battery
Starts discharging the battery at the power you enter.
| Parameter | Required | Description |
|---|---|---|
| Power (W) | No | Discharge power in watts (0–5000). If you leave it empty, the action uses the Default discharge power from Options. |
Stop charging/discharging
Stops the battery charging or discharging. It needs no settings.
Power validation
All device actions respect the Enforce 800 W discharge limit option configured in Options. If it is on (the default for Venus C, Venus D, Venus E and Venus E mini), discharge power above 800 W is rejected. With it disabled, the cap is the per-family maximum listed in Options.
What the actions change on the battery
The actions work by putting the battery in Manual mode with one time slot that covers the whole day. Two things follow from that:
- The battery stays in Manual mode after the action, including after Stop charging/discharging. To let the battery regulate itself again, set Operating mode back to Auto (or AI).
- The actions use schedule slot
0. If you stored your own Manual schedule in slot0, an action replaces it.
An action can take a minute or longer to finish. The integration checks that the battery accepted the change and tries again if it did not.
Technical details
- Actions use Manual mode internally with a 24-hour schedule (00:00–23:59, all days)
- Each action is tried up to 8 times. After each try, the integration waits about one poll cycle to check that the battery took the change, and about one more before it tries again
- Verification confirms the device responded correctly before completing
- Polling is paused during command execution to avoid UDP traffic conflicts
- The command is
ES.SetModewithmanual_cfg.time_num0
How modes are set
The battery's operating mode decides who is in control. Some modes need only a choice; others need a power and a time, so they are set with a service.
| Mode | How to set it |
|---|---|
| Auto, AI | Operating mode select on the device page, or in an automation |
| UPS | Operating mode select, only when your model and firmware support it (firmware 150 or newer on Venus A, D, E 3.0 and Venus E mini; not on Venus C or Venus E 2.0 / HMG-50, where firmware 158 reports Manual after the command) |
| Manual, Passive | The services below, because they need a power and a time (picking them in the select does not apply empty defaults) |
A factory reset and changing the firmware version (Set.Ver) are not services, entities, or recommended actions.
A Manual schedule is stored in numbered slots. How many slots you get depends on the model:
| Family | Valid schedule_slot |
|---|---|
| Venus A / C / D / E | 0–9 |
| Venus E mini | 0–5 (slot 6 and above is rejected) |
The service form accepts 0–9 for every model; the integration then checks the number against your battery and refuses slots it doesn't have.
Use the services
The services do more than the device actions: Passive mode with a time limit, Manual schedules, and an instant data refresh. You can add them in the visual automation editor too. Select Add action, search for Marstek, and fill in the form. Only Set multiple manual schedules needs you to type a YAML list.
Every service needs to know which battery to control. Pick it in the Device field. The only exception is marstek.request_data_sync, where the device is optional and leaving it empty refreshes every battery.
Writing services in YAML
Home Assistant device IDs are 32-character hex strings. Quote them in YAML so they stay strings:
action: marstek.set_passive_mode
data:
  device_id: "a1b2c3d4e5f6a1b2c3d4e5f6a1b2c3d4"
  power: -500
  duration: 300
If you are pasting YAML, prefer the device picker in Developer tools, or pass the battery entity ID / MAC instead of copying a truncated ID from a template.
Services are registered when Home Assistant starts and remain available even if no Marstek devices are currently loaded. If no matching device or config entry is available, the service call will return an error.
Battery automations
Home Assistant 2026.4 and newer has battery triggers and conditions. They list an entity only when its device class matches:
| You pick | Entity | Device class |
|---|---|---|
| Battery is low, became low, no longer low | Battery low | binary_sensor / battery |
| Battery is charging, started charging, stopped charging | Charging | binary_sensor / battery_charging |
| Battery level, level changed, level crossed a threshold | Battery level | sensor / battery, unit % |
Battery power, on-grid power, off-grid power, PV power, and the meter power sensors already use device class power, so they show up under Power (Power value, Power changed, Power crossed threshold). The lifetime energy totals are the Energy dashboard sources. Battery temperature (disabled by default) uses device class temperature.
Replace <battery> with the entity-id prefix from the device name, for example venus_e_3_0.
A Lock Screen or Dynamic Island progress bar is a Companion app notification, not a Marstek action. Paste-ready automations for charging and discharging are in Lock Screen and Dynamic Island.
Notify when the pack becomes low, but only if it is not already charging:
triggers:
  - trigger: battery.became_low
    target:
      entity_id: binary_sensor.<battery>_battery_low
conditions:
  - condition: battery.is_not_charging
    target:
      entity_id: binary_sensor.<battery>_charging
actions:
  - action: notify.persistent_notification
    data:
      title: Marstek
      message: The battery is low and not charging.
Start a charge when the level drops under 20%:
triggers:
  - trigger: battery.level_crossed_threshold
    target:
      entity_id: sensor.<battery>_battery_level
    options:
      threshold:
        type: below
        value:
          number: 20
          unit_of_measurement: "%"
actions:
  - action: marstek.set_passive_mode
    data:
      device_id: "a1b2c3d4e5f6a1b2c3d4e5f6a1b2c3d4"
      power: -1500
      duration: 3600
A condition that the level is still under 30% while charging has started:
triggers:
  - trigger: battery.started_charging
    target:
      entity_id: binary_sensor.<battery>_charging
conditions:
  - condition: battery.is_level
    target:
      entity_id: sensor.<battery>_battery_level
    options:
      threshold:
        type: below
        value:
          number: 30
          unit_of_measurement: "%"
  - condition: battery.is_low
    target:
      entity_id: binary_sensor.<battery>_battery_low
marstek.set_passive_mode
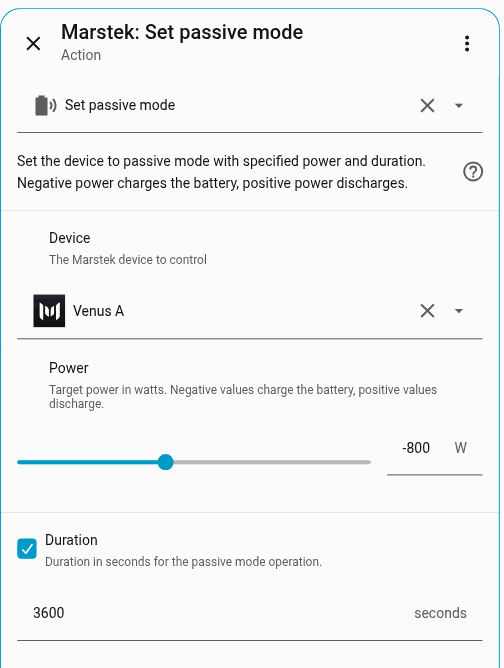
Shown in the editor as Set passive mode. The battery charges or discharges at the power you choose, for the time you choose (Passive mode). Use it for a one-off boost, for example charging for an hour while electricity is cheap.
Power is in watts: a negative number charges, a positive number discharges. Duration is in seconds, so one hour is 3600.
device_id(required): target Marstek devicepower(required, W): negative = charge, positive = discharge- Input range is
-5000..5000, but the effective limit is validated per device/model (and may depend on the Enforce 800 W discharge limit option).
- Input range is
duration(optional, seconds): how long to keep passive mode active (default3600, range0..86400)
Not available on Venus E mini firmware 301. That firmware has no Passive mode, so the action fails with a "mode not supported" error and nothing is sent.
marstek.set_manual_schedule
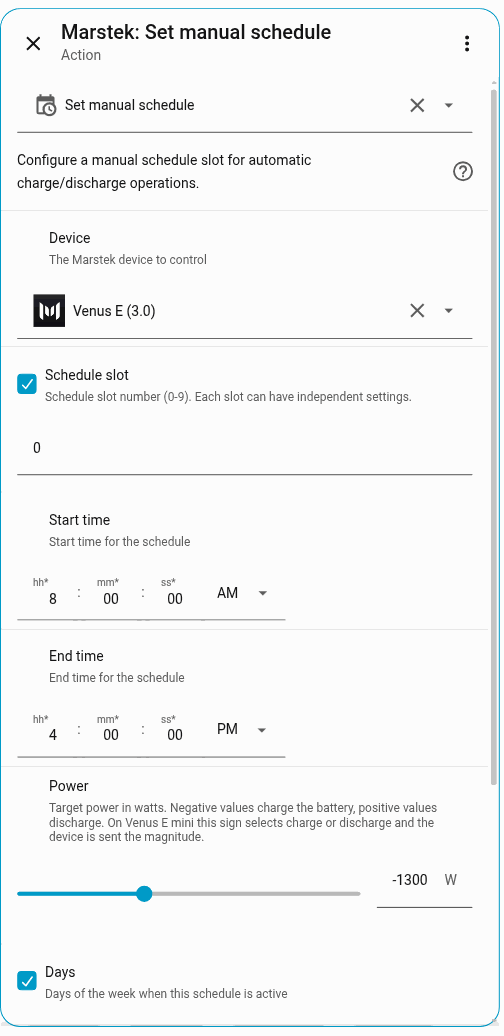
Shown in the editor as Set manual schedule. It sets one time slot of the battery's weekly Manual mode timetable: a start and end time, a power, and the days it applies. Use it when one charge or discharge window is enough.
device_id(required): target Marstek deviceschedule_slot(optional): slot index (default0; max9on Venus A/C/D/E, max5on Venus E mini)start_time(required): start timeend_time(required): end time. It must be later thanstart_time; a slot can't run past midnight, so split an overnight window into two slots (for example 23:00–23:59 and 00:00–06:00).power(required, W): negative = charge, positive = discharge- Input range is
-5000..5000, but the effective limit is validated per device/model (and may depend on the Enforce 800 W discharge limit option). - On Venus E mini you still enter a signed power; the integration converts it. Details for developers: the Open API also has
manual_cfg.manual_set(Rev 3.1: 0 disable, 1 charge, 2 discharge, 3 auto). The service stays signed. The wire payload sendsabs(power)and derivesmanual_set(enableoff → 0, negative → 1, positive → 2). An enabled 0 W slot sends1(charge), not3(auto), until hardware confirms auto. Other families omit the field and keep signedpower.
- Input range is
days(optional): list of weekday values (default all days)- Valid values:
mon,tue,wed,thu,fri,sat,sun
- Valid values:
enable(optional): enable/disable this slot (defaulttrue)
marstek.set_manual_schedules
Shown in the editor as Set multiple manual schedules. It sets several time slots in one go. You type the slots as a YAML list in the Schedules field; the examples below can be copied and adjusted.
device_id(required): target Marstek deviceschedules(required): YAML list of schedule objects- Required per item:
schedule_slot,start_time,end_time - Optional per item:
days,power,enable start_time/end_timemust be strings inHH:MMformat
- Required per item:
Example YAML
Replace
YOUR_DEVICE_IDwith the device ID from the device selector in the UI.
What to paste into the schedules input field
In the Home Assistant service UI, the schedules field expects only the YAML list. Example:
- schedule_slot: 0
  start_time: "10:00"
  end_time: "15:30"
  days: [mon, tue, wed, thu, fri]
  power: -2000
  enable: true
- schedule_slot: 1
  start_time: "18:00"
  end_time: "22:30"
  days: [mon, tue, wed, thu, fri]
  power: 1200
  enable: true
1) Weekday daytime charging (solar/top-up) + evening discharge (peak shaving)
action: marstek.set_manual_schedules
data:
  device_id: YOUR_DEVICE_ID
  schedules:
    - schedule_slot: 0
      start_time: "10:00"
      end_time: "15:30"
      days: [mon, tue, wed, thu, fri]
      power: -2000
      enable: true
    - schedule_slot: 1
      start_time: "18:00"
      end_time: "22:30"
      days: [mon, tue, wed, thu, fri]
      power: 1200
      enable: true
2) Charge at night on a cheap tariff
action: marstek.set_manual_schedules
data:
  device_id: YOUR_DEVICE_ID
  schedules:
    - schedule_slot: 0
      start_time: "00:30"
      end_time: "05:30"
      days: [mon, tue, wed, thu, fri, sat, sun]
      power: -2500
      enable: true
3) Weekend-only discharge (self-consumption boost)
action: marstek.set_manual_schedules
data:
  device_id: YOUR_DEVICE_ID
  schedules:
    - schedule_slot: 2
      start_time: "09:00"
      end_time: "12:00"
      days: [sat, sun]
      power: 800
      enable: true
4) Disable a slot without changing its stored times
action: marstek.set_manual_schedules
data:
  device_id: YOUR_DEVICE_ID
  schedules:
    - schedule_slot: 1
      start_time: "18:00"
      end_time: "22:30"
      enable: false
5) “Workday profile” with three time windows (morning charge, daytime idle, evening discharge)
action: marstek.set_manual_schedules
data:
  device_id: YOUR_DEVICE_ID
  schedules:
    - schedule_slot: 0
      start_time: "06:00"
      end_time: "08:00"
      days: [mon, tue, wed, thu, fri]
      power: -1500
      enable: true
    - schedule_slot: 1
      start_time: "12:00"
      end_time: "13:00"
      days: [mon, tue, wed, thu, fri]
      power: 0
      enable: true
    - schedule_slot: 2
      start_time: "18:00"
      end_time: "23:00"
      days: [mon, tue, wed, thu, fri]
      power: 1000
      enable: true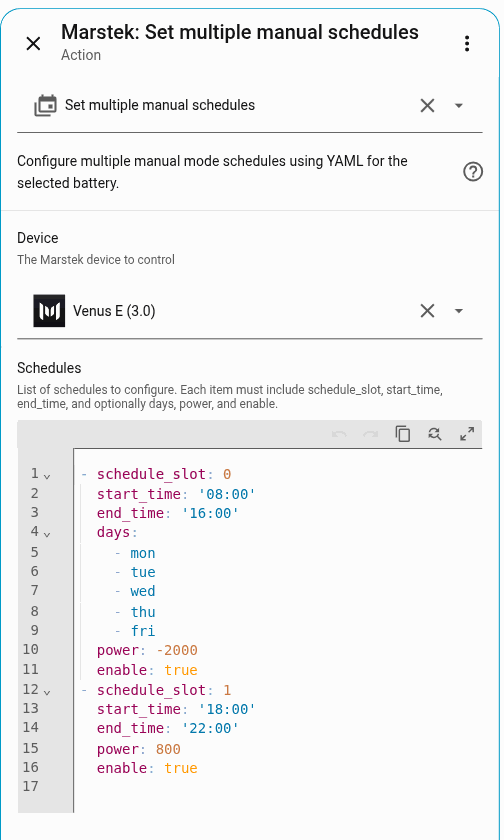
marstek.clear_manual_schedules
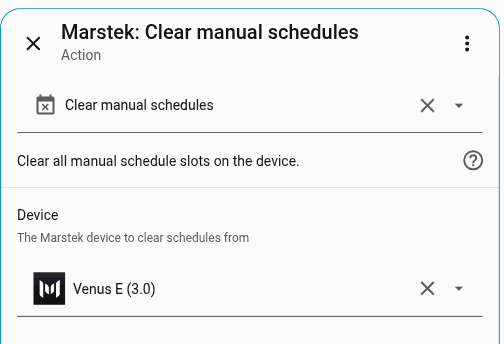
Shown in the editor as Clear manual schedules. It clears every Manual schedule slot on the battery, so you can start again from an empty timetable.
device_id(required): target Marstek device
It clears every slot your model has (10 slots on Venus A/C/D/E, 6 on Venus E mini) one after the other, so it may take a short while.
marstek.request_data_sync
Shown in the editor as Request data sync. It asks the battery for fresh values right away instead of waiting for the next regular update.
device_id(optional): when omitted, all Marstek devices are refreshed
Safety and responsiveness
- By default, the integration sends requests one at a time, because the batteries can stop answering when many arrive at once. While it sends a command, it pauses its regular updates.
- If Parallel API requests is enabled in Options, status requests go out at the same time on purpose, which may be less stable on Wi-Fi.
- If your battery stops responding, increase Delay between requests or Request timeout in Options.