
Configuration
This page shows how to add a Marstek battery to Home Assistant and what happens after setup. Come back here if the battery gets a new IP address, after a firmware update, or if setup can't find your battery.
Add the integration
Before you start, turn on the Open API in the Marstek app. It is off by default, and the integration can't reach the battery without it. See Open API in the glossary.
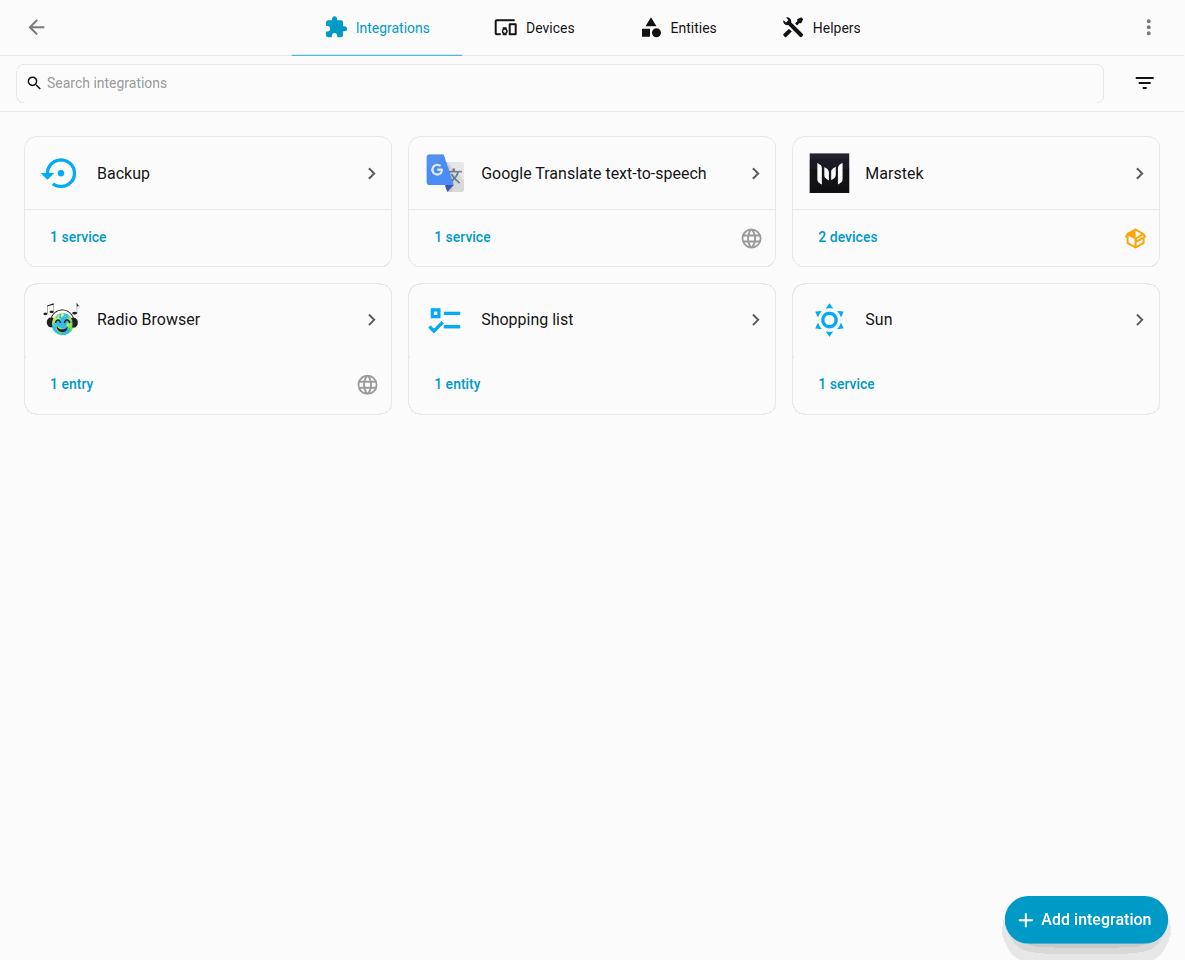
- Go to Settings > Devices & services.
- Click Add integration.
- Search for Marstek.
- Select your device from the discovered list and complete setup.
If your battery is not in the list, or every battery found is already set up, Home Assistant asks you to enter the battery yourself. Type its IP address. You can also enter a port; the default is 30000.
You can change the Open API port for each battery in the Marstek app, and the battery only answers on that port. The search therefore tries 30000, the common custom ports 30001–30004 and 30030, and every port already used by a battery you set up before. If your battery uses any other port, enter it by hand.
Discovery screen examples

Device page
After setup, each battery has its own device page in Home Assistant. Its sensors and controls are listed there.
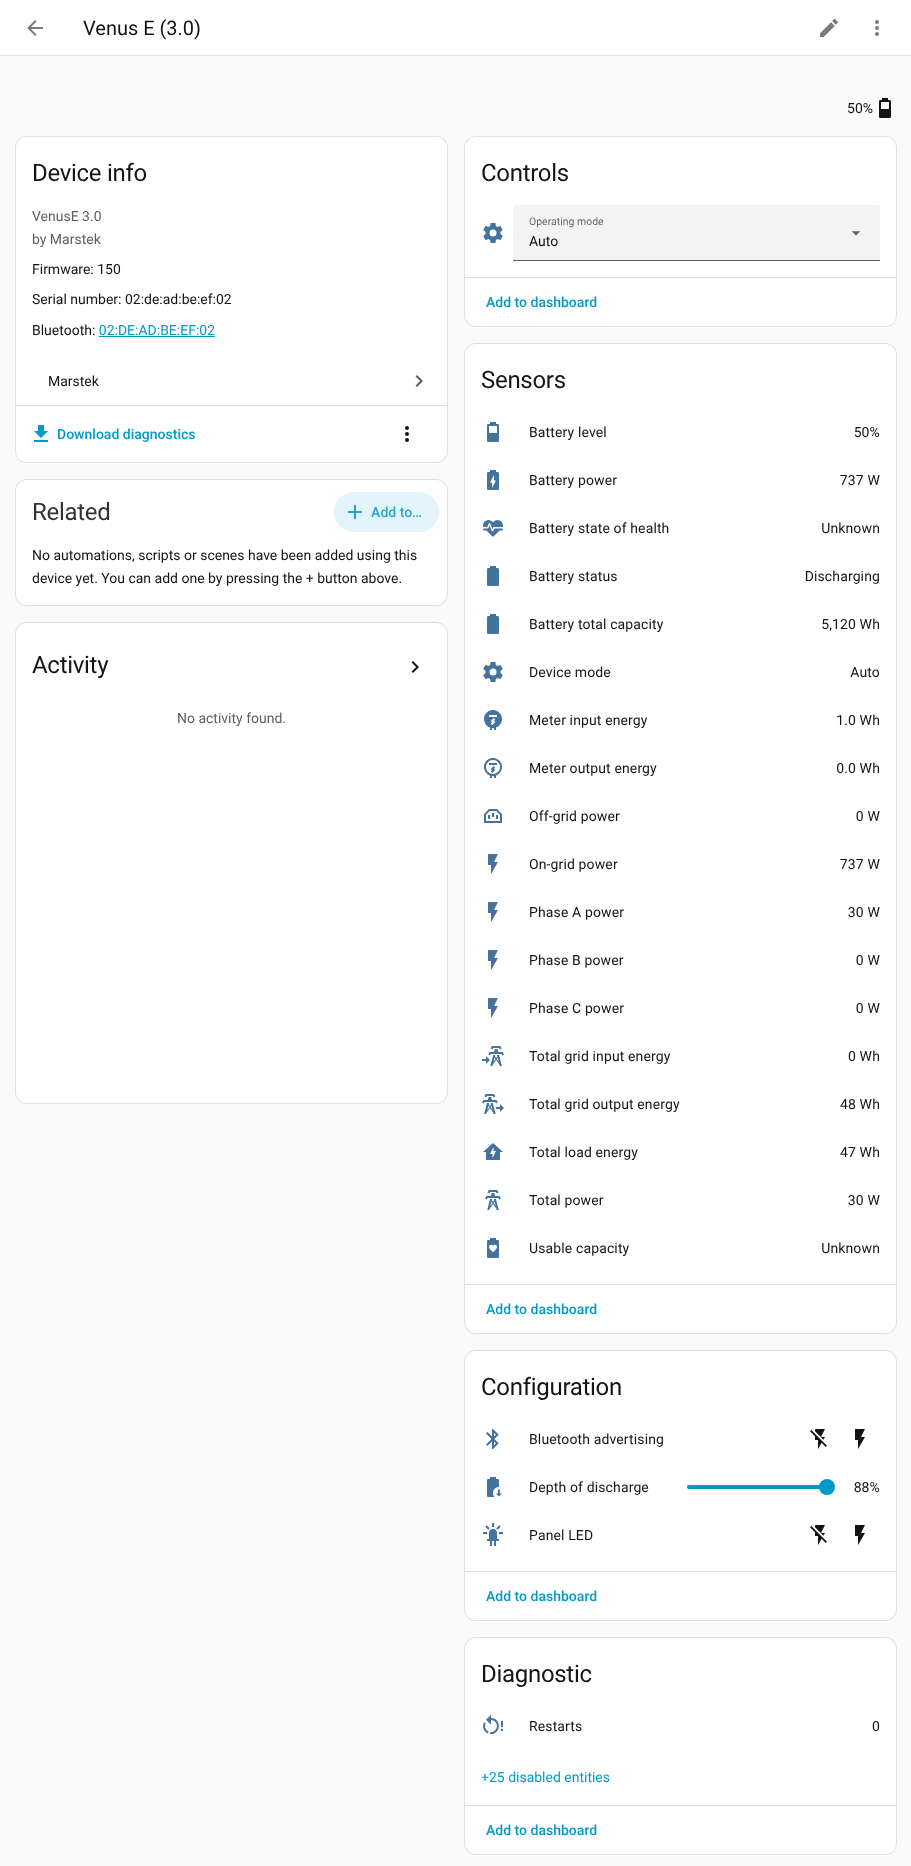
The visual tour continues from here: the Battery health sidebar, the Lovelace cards, and linking a smart plug. Diagnostic sensors such as battery temperature start disabled; how to enable them is in that tour and in Entities.
IP changes
You don't need to do anything when your router gives the battery a new IP address. The integration searches the network in the background and updates the stored address to the one the battery answers from. Your sensors, history and automations stay as they are, because the integration identifies each battery by a hardware address (normally its Bluetooth MAC address), not by its IP address.
Technical details
If your device IP changes (DHCP), the background scanner updates the config entry to the address the device answered from. A Marstek.GetDevice payload can keep naming the previous address after a lease change; that value is not written over a host that is still answering. A DHCP lease from Home Assistant still updates the host.
Unique IDs are based on the device’s BLE MAC (falling back to other MACs when needed) so entities remain stable across IP changes.
Firmware updates
You don't need to delete and re-add the battery after a Marstek firmware update. The integration notices the new firmware version by itself: when Home Assistant starts or reloads the battery, and during its background search, which runs every 10 minutes.
Some firmware versions add or remove features. For example, Venus A going from firmware 148 to 150 gains the depth of discharge, Bluetooth and LED controls and loses the reset warning. When that happens, the integration reloads the battery by itself so the device page shows the right controls. Smaller changes, such as a new Wi-Fi name, are saved without a reload.
If you want the new firmware picked up right away, open the battery in Settings > Devices & services > Marstek and choose Reconfigure. Reconfigure asks the battery directly.
Technical details
The integration stores Open API ver on the config entry and uses it for the firmware profile, the device-registry Firmware field, and the reset-prone repair warning. After a device firmware update it refreshes that value on its own:
- Setup / reload: a unicast
Marstek.GetDeviceto the stored IP (the same request Reconfigure uses). Broadcast discovery is not required, so a VLAN-isolated device still updates. - Background scanner: the 10-minute broadcast sweep still updates firmware when it hears the device. If that sweep sees nothing (no broadcast forwarding), the scanner falls back to the same unicast query.
When the new ver unlocks or removes setup-time capabilities (for example Venus A firmware 148 → 150 adding SYS controls and clearing the Open API reset warning), the config entry reloads automatically. Cosmetic metadata such as Wi-Fi name or a firmware number that does not change those capabilities is stored without a reload.
Venus E 2.0
Venus E 2.0 can be added. Support is experimental. Home Assistant asks you to confirm before creating the entry, then shows a repair warning you can ignore. It uses the same feature gates as Venus C: depth of discharge, Panel LED, and Bluetooth advertising from firmware 158, and no UPS mode. See Troubleshooting.