
Getting started
By the end of this page your battery will show up in Home Assistant, feed the Energy dashboard, and run a first automation. Plan on about 20 minutes, including one Home Assistant restart.
Before you begin, go through Before you start. Most setup problems come from Open API being off. Open API is the battery's local connection, and you switch it on in the Marstek app.
Step 1: Install the integration
The integration is installed through HACS, the Home Assistant Community Store. HACS is a free add-on that installs community integrations and keeps them updated. If you don't have it yet, follow the HACS installation guide first. Setting up HACS takes about 10 minutes and needs a free GitHub account.
This integration is not in the HACS default list, so you add it as a custom repository. That only tells HACS where to download it from.
The quick way
If your Home Assistant is set up for My Home Assistant links, select this button. It opens HACS on the right page:

Select Download, then continue at restart Home Assistant.
Step by step
In Home Assistant, open HACS from the sidebar.
Select the three-dot menu in the top-right corner, then Custom repositories.
In Repository, paste:
texthttps://github.com/taurgis/has-marstek-local-apiIn Type, select Integration, then select Add.
Close the dialog. Search HACS for Marstek and open it.
Select Download, and confirm.
Restart Home Assistant
Home Assistant only loads new integrations at startup. Go to Settings > System, select the power icon in the top-right corner, and select Restart Home Assistant.
No HACS?
You can copy the custom_components/marstek folder from the repository into your Home Assistant config/custom_components/ folder and restart. You will have to repeat that for every update. See Installation.
Step 2: Add your battery

Or by hand:
- Go to Settings > Devices & services.
- Select Add integration and search for Marstek.
- Home Assistant searches your network. Pick your battery from the list.
Home Assistant may already have found it. Then it shows up as Discovered at the top of Devices & services. Select Add there. Don't select Ignore, or Home Assistant stops offering it.

Battery not in the list? Choose Enter IP/port manually. If Home Assistant found nothing at all, it shows that form straight away. Type the battery's IP address and the port from the Marstek app (usually 30000). The automatic search doesn't work across separate networks (VLANs) or on some mesh Wi-Fi systems. Typing the address is normal in those cases, and the battery works the same way afterwards.
Still nothing? Open troubleshooting: device not discovered.
More than one battery?
Repeat this step for each battery. Every battery becomes its own entry.
Step 3: Look around the device page
Open Settings > Devices & services > Marstek and select your battery. You'll see something like this:
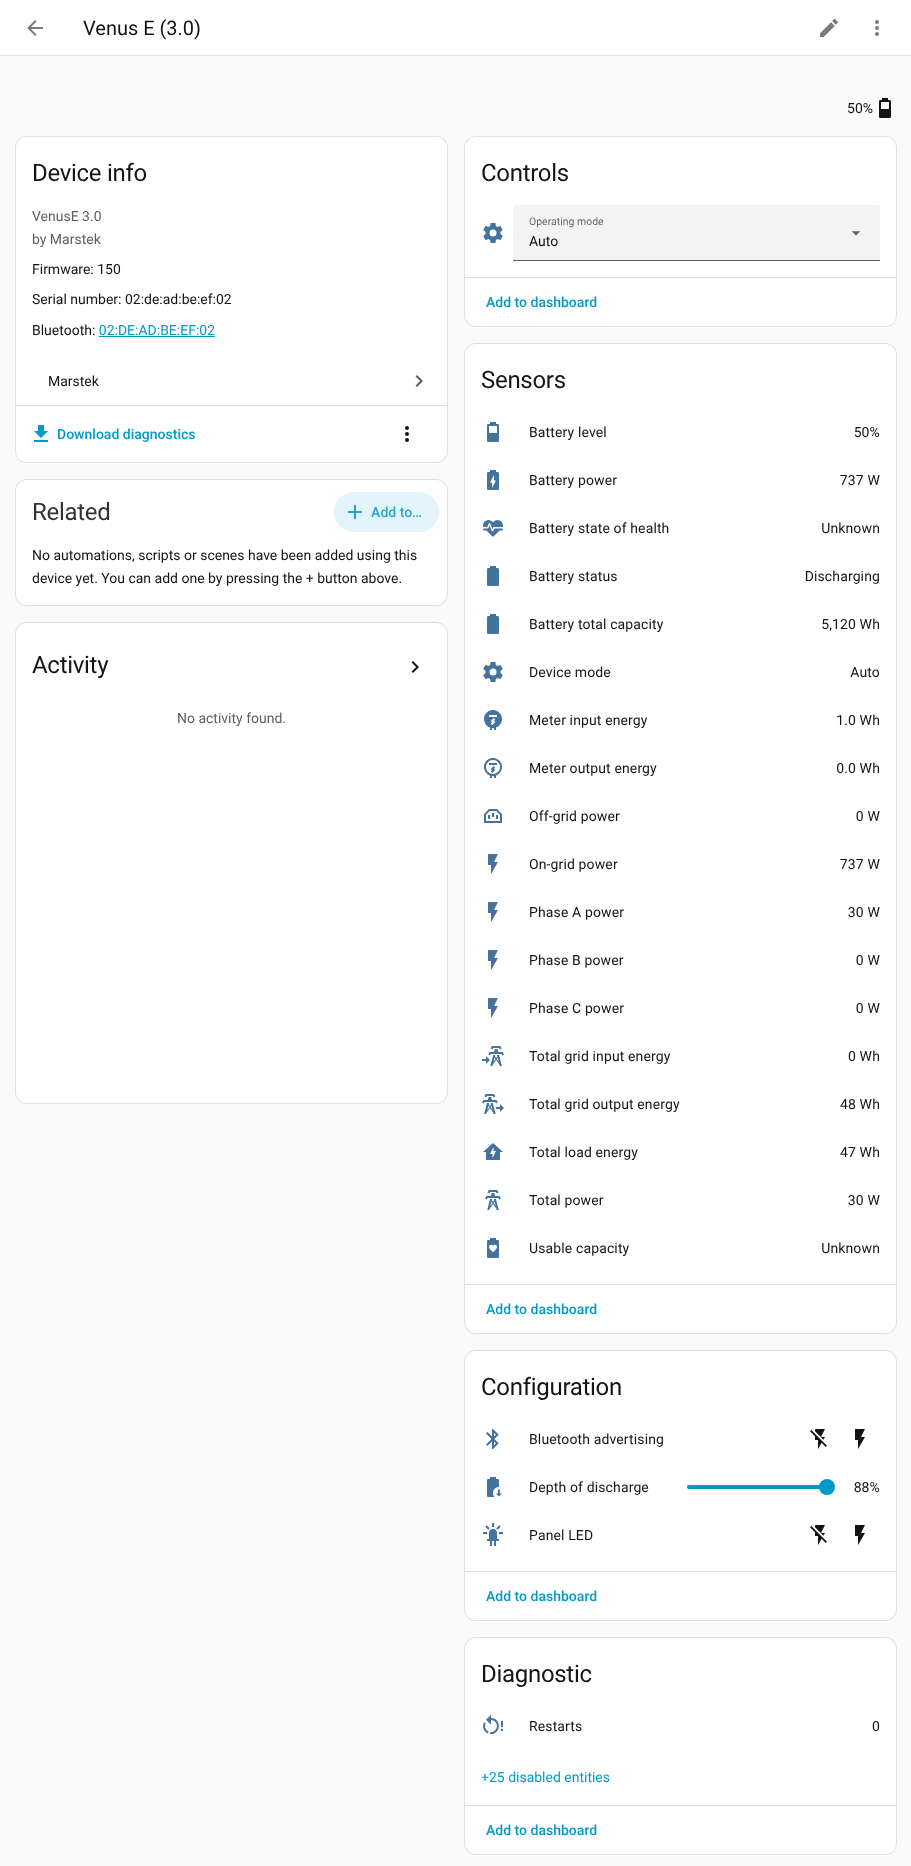
What you are looking at:
- Battery level is the state of charge, in percent.
- Battery power is how fast the battery charges or discharges, in watts.
- Operating mode is a dropdown. Auto is self-consumption: the battery follows your grid meter to keep grid import near zero.
- Total power is the power at your grid meter, when a CT meter is connected. The CT meter is the clamp-on meter at your fuse box. Phase A/B/C power split it per phase. Venus C below firmware 155 doesn't have these.
- Solar (PV) sensors appear on Venus A and Venus D.
Some diagnostic sensors, such as Battery temperature, start disabled on purpose. To fill them, Home Assistant has to ask the battery for extra data, and that request has been linked to battery resets on some firmware.
If you want one of them later:
- Open it from the Diagnostic section of the device page. If they are hidden, select the + … entities link first.
- Select the gear icon.
- Switch on Enabled, and select Update.
On firmware older than 150 (Venus C: 156) the battery detail sensors are left out entirely. Update the battery firmware first. Entities lists every sensor. Home Assistant calls each sensor or control an entity.
Readings refresh every 30 seconds. That is normal. The battery doesn't send changes by itself, so Home Assistant asks for them on a timer.
Step 4: Add it to the Energy dashboard
- Go to Settings > Dashboards > Energy.
- Under Home battery storage, add Total grid input energy as energy going in to the battery and Total grid output energy as energy coming out. Despite the word "grid", they count energy through the battery's own AC connection (its mains plug or cable).
- Under Electricity grid, use your house meter if Home Assistant already has one, for example a P1 meter. If not, and your Marstek CT meter reports them, use Meter input energy and Meter output energy.
- On Venus A and Venus D, solar passes through the battery, so adding Total solar energy as well counts it twice. Energy dashboard explains how to choose.
The Energy dashboard updates once an hour, so give it a while. The values are in watt-hours, which Home Assistant converts for you. Details and the reasoning are on Energy dashboard.
WARNING
Leave Total load energy out of the Energy dashboard. What it measures differs between models and firmware.
Step 5: Build a first automation
A common first automation charges the battery while power is cheap. This one charges at 1500 W from 02:00 for one hour every night, then hands control back to the battery's Auto mode.
The most direct tool for this is passive mode. It tells the battery "charge (or discharge) at this power for this many seconds". When the time runs out, passive mode ends. Marstek doesn't document what the battery does next, so the automation switches it back to Auto to be sure.
At 1500 W, one hour adds about 1.5 kWh. Change duration to charge more or less.
Go to Settings > Automations & scenes and select Create automation > Create new automation.
Select the three-dot menu > Edit in YAML and paste the text below. YAML is the text format Home Assistant uses for automations. You only paste it once; step 3 switches back to the visual editor.
yamlalias: Charge the battery at night triggers: - trigger: time at: "02:00:00" actions: - action: marstek.set_passive_mode data: device_id: REPLACE_ME # step 3 fills this in power: -1500 # negative = charge, positive = discharge duration: 3600 # seconds - delay: "01:00:05" - action: select.select_option target: entity_id: select.REPLACE_ME # step 3 fills this in data: option: auto # the stored value is lowercaseSelect Edit in visual editor. On the Set passive mode action, pick your battery. Home Assistant fills in its device ID, a long internal code you never type yourself. On the last action, pick your battery's Operating mode entity (the dropdown you saw on the device page).
Check that no
REPLACE_MEis left, then save.
The next morning, open the battery's Battery power history. You should see it charging from 02:00 to 03:00, and Operating mode back on Auto.
Discharging is capped at 800 W by default
On Venus C, D, E, and E mini, the Enforce 800 W discharge limit option is on, so a discharge above 800 W is refused. Charging is not affected. If your battery is wired in rather than plugged into a socket, you can turn it off under Options.
Or with the device actions
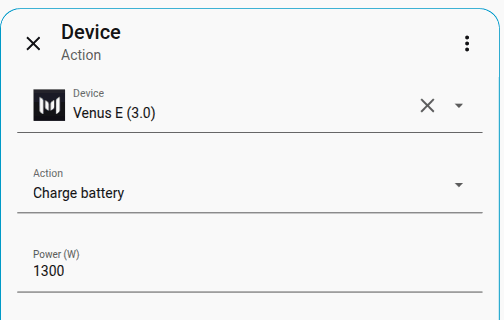
The automation editor also has Charge battery, Discharge battery, and Stop charging/discharging as device actions. They are handy, with one thing to know: Charge and Discharge put the battery in Manual mode with an all-day schedule, and they keep going until you send Stop. Stop leaves the battery in Manual mode. They all use schedule slot 0 and replace whatever was in it; other schedule slots you set keep running. Set Operating mode back to Auto afterwards if you want self-consumption again.
More recipes, including weekly schedules for time-of-use tariffs, are in Automations and services.
NOTE
Venus E mini firmware 301 refuses passive mode. Use the device actions or manual schedules on that model.
You're done
The battery is in Home Assistant, on the Energy dashboard, and under automation control. Good next steps:
- Tune how often Home Assistant asks for data (polling) and the default power under Configure on the battery. See Options.
- Put state of charge and power on a dashboard with the built-in cards. See Dashboard cards.
- Turn on the Battery health dashboard to track capacity over time.
- Read Limitations so nothing surprises you later.
If something goes wrong later
- Entities show as unavailable. Usually Wi-Fi or a battery restart. The integration keeps showing the last values until three update attempts in a row fail. Why a battery goes offline helps you tell the cases apart.
- A warning appears under Settings > System > Repairs. Open it. Most warnings explain one thing to do, such as updating the battery firmware. See Repairs.
- The battery stopped answering after you changed something in the app. Check that Open API is still on. Some firmware switches it off. See troubleshooting.
- Updating. HACS shows an update when a new release is out. Install it and restart Home Assistant. After a battery firmware update you don't need to do anything: the integration picks up the new version within about 10 minutes.